Converting JPG images into vector files is essential in many design processes, including embroidery, printing, and branding. This blog compares automatic and manual JPG to vector conversion methods to help businesses and designers choose the right approach based on quality, time, and complexity.
Understanding JPG to Vector Conversion
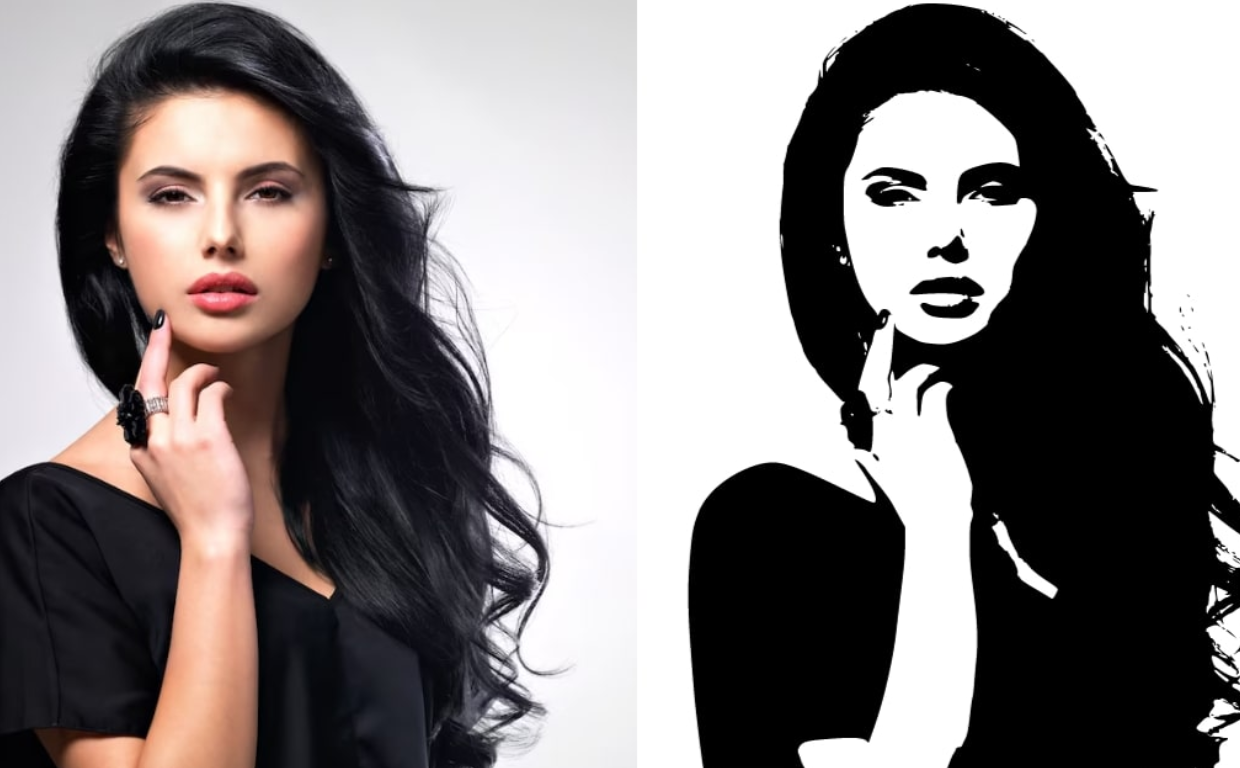
JPG to vector conversion transforms raster images into scalable vector graphics using either software automation or manual illustration. This process is vital for preserving image quality when resizing or preparing files for embroidery digitizing and large-format printing.
Raster images like JPGs are made of pixels, which lose clarity when enlarged. Vectors, however, use mathematical paths, making them resolution-independent and ideal for high-detail applications like those offered at Mahi Digitizing’s vectorization service.
Whether you’re converting a logo, artwork, or embroidery pattern, selecting the right method affects the final outcome significantly. This section lays the foundation for understanding both approaches before making a decision.
Designers need to consider factors like image complexity, time constraints, and desired file quality before choosing a method. This ensures a smooth production workflow with minimal edits and rework.
For embroidery files, accuracy is especially important. Clean vector paths ensure crisp stitch outputs, making digitization more reliable and visually consistent across products.
Benefits of Automatic JPG to Vector Conversion
Automatic JPG to vector conversion relies on software algorithms to trace and convert pixel-based images into vector paths. Tools like Adobe Illustrator’s Image Trace and CorelDRAW streamline the process, offering fast results for simple graphics.
This method is ideal when time is limited or the artwork has minimal detail. For example, converting basic icons, text-based logos, or silhouettes can be done efficiently using automatic tools.
Cost-effectiveness is another major advantage. With minimal manual input, businesses save on design costs, especially when working with high volumes of graphics or quick turnaround requirements.
However, automatic conversion often requires post-processing. Inaccurate paths or misaligned shapes can occur, particularly when the source image has noise, gradients, or fine detailing.
Despite its limitations, automation is a powerful tool in the right context. For streamlined tasks, automatic conversion provides speed and convenience while reducing manual effort.
Advantages of Manual JPG to Vector Conversion
Manual vectorization involves hand-tracing the image using software tools to recreate it with precision. This method ensures clean lines, perfect curves, and detailed reproduction of the original design.
It is especially useful for complex logos, artworks, or patterns requiring detailed reproduction. Designers can control every element, from stroke thickness to gradient layering and shape alignment.
Manual vector files are ideal for embroidery and patchwork where every stitch matters. At Mahi Digitizing, we specialize in crafting high-quality vector files that match your specifications for production-ready designs.
Though time-intensive, manual conversion delivers unmatched accuracy. Designers can clean up blemishes, smooth irregular shapes, and ensure full scalability without distortion.
For premium results, brands should invest in manual vectorization for detailed logos, intricate crests, and other high-visibility assets that represent their identity.
Limitations of Each Conversion Method
Automatic vectorization often lacks the precision needed for intricate designs. It can introduce noise, uneven shapes, or stray paths that require additional editing post-conversion.
On the other hand, manual conversion can be time-consuming and expensive. Businesses working with tight deadlines or budgets may find it challenging to accommodate manually traced vectors.
Both methods also require quality source images. Blurry or low-resolution JPGs complicate the conversion process, leading to inaccuracies regardless of the technique used.
To ensure optimal output, consult with experienced professionals. Reach out to Mahi Digitizing to evaluate your image and recommend the most suitable conversion approach.
Ultimately, the right choice depends on your project’s complexity, urgency, and quality expectations. Balanced judgment leads to efficient workflows and consistent branding.
Choosing the Right Approach for Your Project
For simple tasks, automated tools work well. But when quality and detail matter, manual vectorization becomes essential. It provides better control over how the final artwork looks and performs.
Many design professionals use a hybrid approach: starting with automatic tracing and refining the output manually. This balances speed with quality for projects that need both efficiency and accuracy.
Consider outsourcing vector conversion to a professional service like Mahi Digitizing’s Vector Art Team. We offer expert-level results tailored to your use case and production process.
Whether you’re prepping embroidery files, signage, or apparel artwork, quality vectorization saves time down the road and ensures consistent output across platforms.
Make your choice strategically based on what matters most: speed, detail, or cost. Each project may require a different balance, and expert advice helps find the best solution.