
High-quality embroidery starts with well-digitized stitch files. A properly optimized stitch file ensures smooth machine operation, precise stitching, and minimal errors. In this article, we’ll explore the best practices for creating high-quality embroidery stitch files to achieve perfect results every time.
Understanding Embroidery File Formats
Choosing the right embroidery file format is essential for ensuring compatibility with embroidery machines. Different machines support various file types, including DST, PES, EXP, and JEF. Understanding these formats helps in producing files that work seamlessly with specific machine models.
DST files are widely used in commercial embroidery due to their **efficiency and minimal file size**, while PES files are preferred for home embroidery machines. Before creating a stitch file, always check the machine’s specifications to ensure proper format selection.
Converting designs into the correct format maintains **design integrity and prevents errors** during production. Explore our vectorization services to convert low-resolution images into high-quality embroidery files.
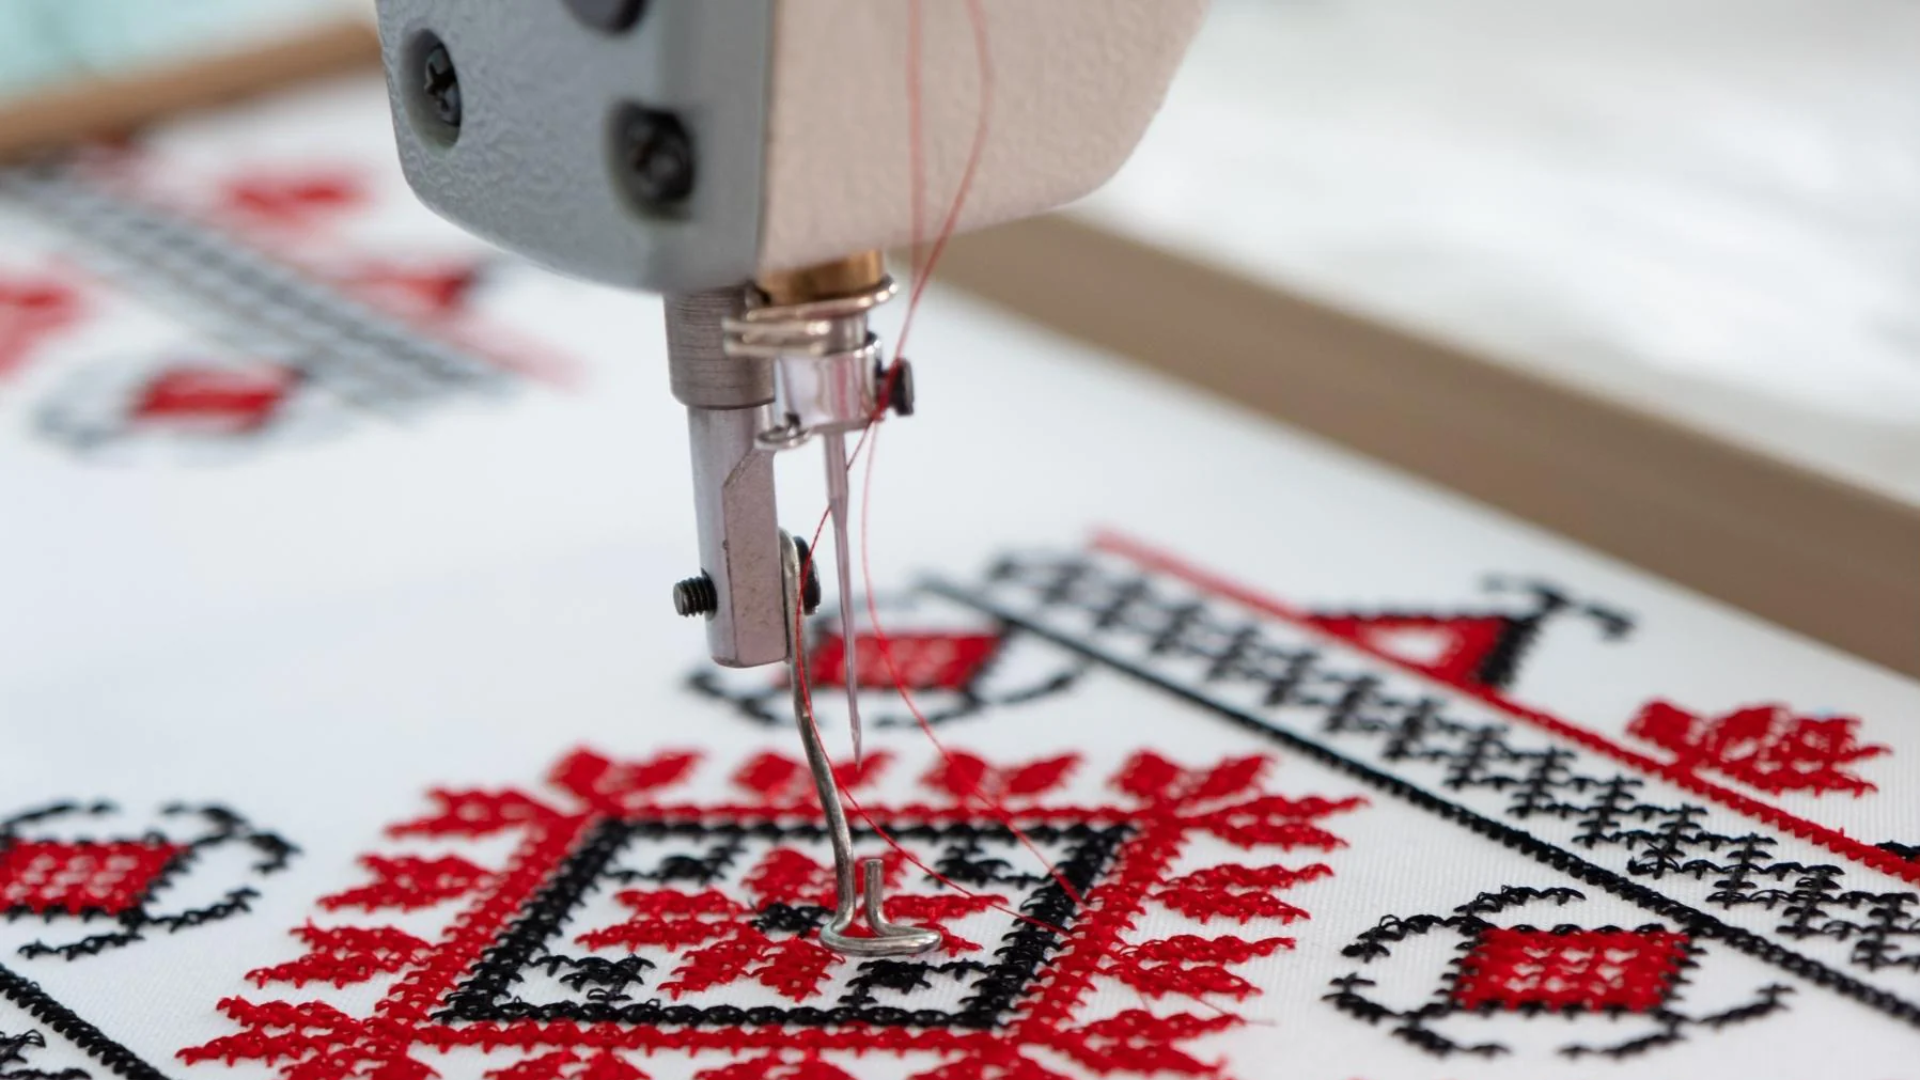
Optimizing Stitch Density and Underlay
Stitch density plays a crucial role in embroidery quality. If the density is too high, it can cause **thread breakage, puckering, and fabric distortion**. If it’s too low, the design may appear incomplete or loose. A balanced stitch density ensures durability and a smooth finish.
Underlay stitching is equally important, as it provides **a stable foundation** for embroidery. Proper underlay prevents fabric shifting and enhances the final look. Common underlay types include **edge run, zigzag, and tatami**, each serving different fabric types and embroidery styles.
Using the right stitch density and underlay settings improves **stitch accuracy and reduces production time**. Get expert embroidery digitizing to optimize stitch density for flawless designs.
Choosing the Right Stitch Type for Design Elements
Different embroidery elements require specific stitch types for optimal results. The three main stitch types are **satin, fill (tatami), and run stitches**, each serving a different purpose based on the design’s complexity and size.
Satin stitches are ideal for **text and small details**, offering a smooth and glossy appearance. Fill stitches work best for **larger areas**, providing even coverage without excessive thread use. Run stitches are used for **outlines and fine details**, ensuring precision without adding unnecessary bulk.
Proper stitch selection enhances design clarity and machine efficiency, reducing unnecessary thread breaks and errors. Discover professional digitizing solutions that guarantee the right stitch types for every design.
Managing Thread Colors and Layering
Embroidery machines rely on a well-structured thread sequence to **accurately reproduce colors and layers**. Incorrect color sequencing can lead to overlapping stitches, excessive trims, and misaligned elements, affecting the final output.
To avoid issues, assign **logical color sequences** in the digitizing software and minimize unnecessary thread changes. Efficient color management reduces production time and ensures a **smooth embroidery process** without excessive stops.
Using high-quality embroidery threads that match the **fabric type and design complexity** further enhances results. Check out our custom embroidery solutions for high-quality threadwork in every design.
Testing and Refining Embroidery Designs
Even with precise digitizing, testing embroidery designs before full-scale production is essential. Running a sample stitch-out allows for identifying **potential issues** such as incorrect stitch density, misaligned elements, or fabric puckering.
Refining the design based on test results ensures the final embroidery is **flawless and production-ready**. Adjustments may include tweaking underlay settings, fine-tuning stitch direction, or modifying pull compensation to achieve the desired look.
Regular testing helps maintain **high-quality embroidery standards** and prevents costly mistakes. Learn how Mahi Digitizing ensures perfect embroidery results with expert testing and refinement.
Conclusion
Creating high-quality embroidery stitch files requires **attention to detail, proper digitizing techniques, and continuous testing**. From selecting the correct file format to optimizing stitch density and sequencing colors effectively, every step impacts the final embroidery outcome.
Businesses and embroiderers who follow these best practices can **achieve professional results, minimize errors, and enhance embroidery efficiency**. Investing in expert digitizing ensures high-quality designs that stitch smoothly on any fabric type.
Get high-quality embroidery digitizing services and take your embroidery to the next level!